
From Category: DIY / Tips & Tricks

I was in a horrible mood yesterday. So I did what any sane girl would do. I picked up my phone and called up one of my best friends to get it all out of my system. Luckily, she picked up (which was something rare) and we found ourselves talking about a lot of things for the next 2 hours.
One of the topics that we discussed during that phone call was happiness. As we recalled from our childhood memories, we realized that happiness was easier back then. A box of new crayons could keep us happy for probably the whole semester. Back then, it wasn't hard to answer the question "what would make you happy". Cheering yourself up meant an ice cream, a new bottle of glitter glue and a packet of stickers.
Now, as adults what could we do to cheer ourselves up when we are feeling down? Glitter glue and heart-shaped stickers definitely don't cut it anymore. Maybe a unicorn as a pet might be the answer to all my prayers? Who knows...
Monday, March 11, 2019


Before I dive into my Korea trip's itinerary, I thought it might be useful to compile a list of tips/lessons that I learnt while I was preparing or on my trip. For those who are heading to Korea whether with friends or alone, I hope this helps :)
Saturday, December 2, 2017


- I passed my internal interpretation exam with the highest score in my class although I didn't study beforehand.
- I was really blessed to be given the opportunity to be the branch manager when my manager's away. It's tough and tiring having to juggle both roles at the same time but I survived.
- Professional year's wrapping up this Sunday. After this Sunday, I can finally have a day off to myself BUT before that I have to prepare for a presentation which I have not started yet. It's so near yet so far!!! Can't wait to hit the Dior's exhibition with my friend next Sunday, the thought of having a day off is so surreal!!
- 6 weeks till my Korea trip 신난당!!!
The list above doesn't seem bad at all right? Despite all these good things, I was dreadfully exhausted - mentally and physically.
Friday, September 15, 2017

One life changing habit that I have developed after living in Melbourne for 4 years is that I can't leave the house without bringing a lipbalm along with me!!!!!!!!


Can't stand the annoying lines on my lips...Especially when I have to put on lipstick or lip tints on my lips...It gets really hideous!

Instead of following Ryan Higa's method, I only used Raw Sugar. ONLY RAW SUGAR~

I suppose the effect would have been much better if combined with honey, but I didn't have any bit of confidence that I wouldn't make a big mess in the washroom (especially when I had to hold a camera in my other hand).

Take a small amount of raw sugar and add a few drops of water to it!

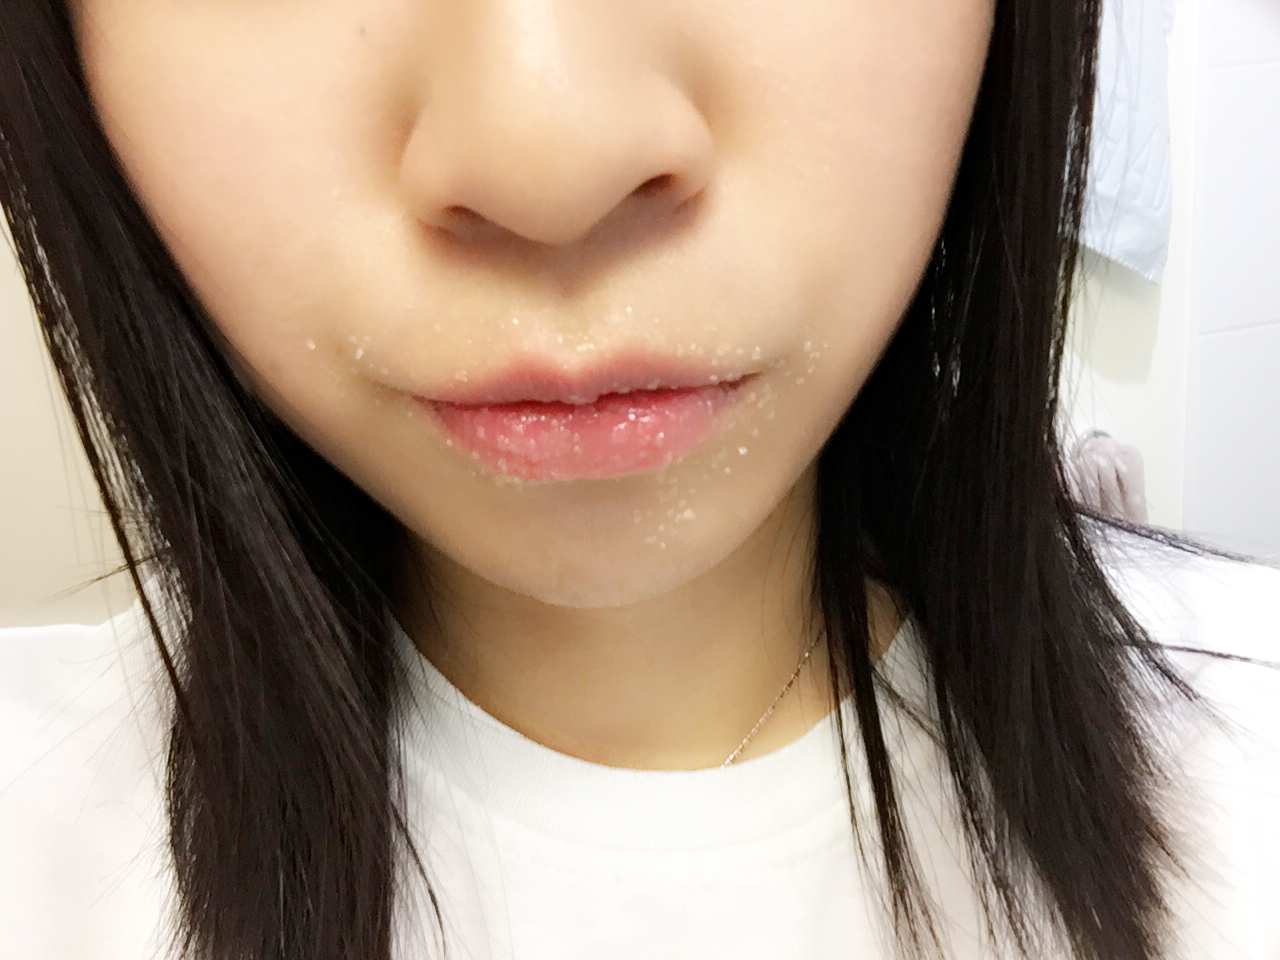
Then just massage the wet raw sugar onto your lips for a short while. 30 seconds - 1 minute should be enough.
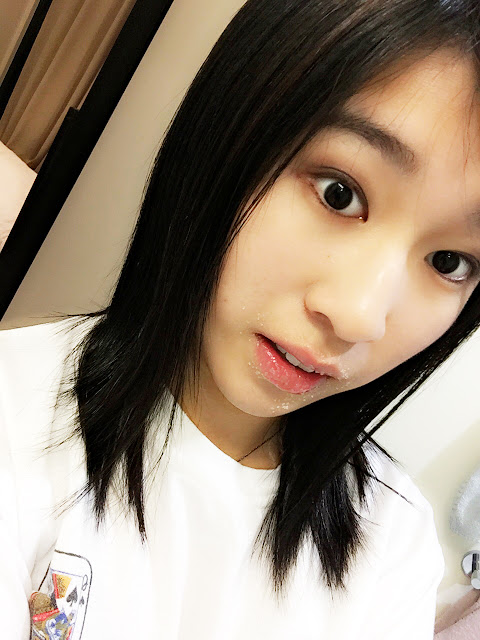
This is how you will look in the process :p

No harm eating the raw sugar if you are a sweet tooth :3

It's THIS simple ^^


I personally love topping it off with a thin layer of Papaw Ointment.
I highly recommend this product because it has proven effective, the only downside of it is that you need to apply with your hand or a brush.


Now just go around with a wide smile!
The cold and dry weather in Melbourne always leave me with dry lips. Sometimes, it is so dry to the extent that even smiling is painful.


I haven't gotten around to try out those famous lip masks from Korean brands. I heard that they are a bomb nowadays, even Michelle Phan featured them in her videos and blog posts too. However, the sad thing is....these are very hard to find in Melbourne, and even if you could find it, it's very pricey (seeing the fact that it's an one-off product which can't be reused, I can't help being stingy!)
One day, I heard Ryan Higa (yes, you read it right, THE RYAN HIGA on Youtube) said that in one of his behind of the scenes videos that his makeup artist used raw sugar and honey to scrub his dry lips. ANDDDDD, Michelle Phan also did mention this trick in her book too!!!!
I was a bit skeptical at first but it's a very low cost and natural remedy to cure dry lips. I had nothing to lose afterall I have all the ingredients in my kitchen anyway :p


Can't stand the annoying lines on my lips...Especially when I have to put on lipstick or lip tints on my lips...It gets really hideous!

Instead of following Ryan Higa's method, I only used Raw Sugar. ONLY RAW SUGAR~

I suppose the effect would have been much better if combined with honey, but I didn't have any bit of confidence that I wouldn't make a big mess in the washroom (especially when I had to hold a camera in my other hand).

Take a small amount of raw sugar and add a few drops of water to it!

Then just massage the wet raw sugar onto your lips for a short while. 30 seconds - 1 minute should be enough.
Remember to not do it vigorously to avoid hurting your lips~

This is how you will look in the process :p
No harm eating the raw sugar if you are a sweet tooth :3
After that just wash it off your lips with water.

It's THIS simple ^^

The result is instant. Your lips are now much smoother and the lines are less visible. Applying lipsticks are much easier too.

Photos as evidence!!! In just 1 minute!!

I personally love topping it off with a thin layer of Papaw Ointment.
I highly recommend this product because it has proven effective, the only downside of it is that you need to apply with your hand or a brush.
Not sure whether you can get this everywhere but any lip balm or Vaseline petroleum jelly will do the trick too!


All done! Smooth lips in just a 1 minute!
Since I haven't gotten to try out the lip masks I can't justify how effective they are, but this method works well enough for me. Afterall it's a natural remedy that comes with a super low cost :D

Now just go around with a wide smile!
Remember, a smile is always the best makeup a girl can put on!
XOXO
Wednesday, August 12, 2015

Annyeong my unicorns! Finally I'm back....let's just not talk about how much I suffered throughout the exam period - I did horribly in the exam and my backache is getting worse. Anyway, I just thought that I should be back on blogging after being #MIA for so long.
These days, I am quite into watching the DIY Youtubers when I run out of things to watch on Youtube. My favourite ones are Bethany Mota and Belinda Selene. I think most of you all would have already known Bethany, she's even younger than me but she has achieved so much in life *role model* Belinda is really good at decorating her planner and that's how I found her. After watching Bethany and Belinda on Youtube, I suddenly had the urge to do some DIYs myself (but I'm really bad at handicrafts to be honest).
So one day, out of no where, the idea hit me! I had always wanted to look for a storage box or something that can hold all of my skincare products. Initially I planned to find something from Daiso but I couldn't seem to find something that could carry my things perfectly - they are either too big or too small or too narrow or to wide....just unsuitable.
That's the reason why my skincare products were always literally EVERYWHERE. How unorganized~
So here's a tutorial of how I got everything in place ^^

It holds all my things perfectly! And it's all done by me!!! :3


First you need a box which is of your desired size. This box was the box that carried the product that I bought for eBay, so yeah....it didn't cause me any trouble finding one. I just used it because it was there (That was BEFORE I figured out my things could fit perfectly in it LOL!)

Next, cut away the sides of the box
(ps: I really can't remember what did I buy that cost me $7.20 hmmmm)

After you finish cutting all 4 sides, you will have something that looks like this.

I used Washi Tapes for decoration, but you can actually use pretty wrapping papers if you have, or some magazine spreads. It's totally up to you! Washi Tapes are the only decorative things I have with me and I bought 2 of these for $2.80 so it's not that expensive (from Daiso).

Start wrapping! Just go all over the box until you cover the whole thing. This may take some time.
Although my washi tapes are quite fancy on their own, I decided to add some glam to the box.

My representative sign - STARS!!!

Put a short transparent tape at the back of the star like this and slap it on randomly on your box.

This is the end product. Okay, ignore the very bad handwork. I personally don't have much patience when it comes to doing handicrafts (I used to get the 2nd lowest mark in my class for Art, that's just self-explanatory #sorrynotsorryLOL!)
YOU'RE DONE! The last thing is to pop all your things inside the box.

Since I have a few products that are in tube-form, I decided to put a polystyrene cup in there to hold them in place.

Despite the rough handwork, it still looks cute when I put it up....So, why bother?!?! HAHAHA!
Here's my neat makeup and skincare section! I love the fact that the box is deep enough to carry the tall bottles and surprisingly they fit every single thing!!!
You can see that I have my Michael Jackson badges as decorations by the side of the shelves, and next to the skincare storage box is the cup that holds my BB cream and lip products. The eyeliner sticking out from the cup is a new one that I just got a few days ago, haven't tried it on though but I will be doing a review on it soon. On top of the cup is a photo of my mom and I. The blue drawer storage on the very right holds all my makeup - eyeliners, eyeshadows, foundations, mascara, eyelid tapes and eyebrow trimming products. Some makeup wipes on the top and some extra products which I don't have to use them yet.
Yeah~ that's all for today! It feels so good to be back on my blog again ♥ I will try to blog as frequent as possible! I have a lot of pending blog posts which I have already scheduled in my diary which are to be posted up in the near future, so stay tuned!

I'm also working on some song covers. This time, it will be completely different the usual covers where I play guitar and sing all by myself. I'm actually learning how to do audio editing, trimming, recording with real microphones and even doing all the harmonizing myself. My housemate is more like the music producer! HAHA! It's a very fresh thing to us so we find it really amusing!!! Got myself a new Youtube channel > Fion Paris (please subscribe if you haven't)
Peace and Love xoxo

☮ Quote to share: A dream is just a dream. A goal is a dream with a plan and a deadline ~Harvey Mackay
Facebook: Fionism
Twitter: MJandOri4eva
Instagram: mjandori4eva
Dayre: Fion Paris
Tumblr: mjandori4eva
Youtube: fionparis
Email: fionism@yahoo.com
These days, I am quite into watching the DIY Youtubers when I run out of things to watch on Youtube. My favourite ones are Bethany Mota and Belinda Selene. I think most of you all would have already known Bethany, she's even younger than me but she has achieved so much in life *role model* Belinda is really good at decorating her planner and that's how I found her. After watching Bethany and Belinda on Youtube, I suddenly had the urge to do some DIYs myself (but I'm really bad at handicrafts to be honest).
So one day, out of no where, the idea hit me! I had always wanted to look for a storage box or something that can hold all of my skincare products. Initially I planned to find something from Daiso but I couldn't seem to find something that could carry my things perfectly - they are either too big or too small or too narrow or to wide....just unsuitable.

That's the reason why my skincare products were always literally EVERYWHERE. How unorganized~
So here's a tutorial of how I got everything in place ^^

It holds all my things perfectly! And it's all done by me!!! :3

First you need a box which is of your desired size. This box was the box that carried the product that I bought for eBay, so yeah....it didn't cause me any trouble finding one. I just used it because it was there (That was BEFORE I figured out my things could fit perfectly in it LOL!)

Next, cut away the sides of the box
(ps: I really can't remember what did I buy that cost me $7.20 hmmmm)

After you finish cutting all 4 sides, you will have something that looks like this.

I used Washi Tapes for decoration, but you can actually use pretty wrapping papers if you have, or some magazine spreads. It's totally up to you! Washi Tapes are the only decorative things I have with me and I bought 2 of these for $2.80 so it's not that expensive (from Daiso).

Start wrapping! Just go all over the box until you cover the whole thing. This may take some time.
Although my washi tapes are quite fancy on their own, I decided to add some glam to the box.

My representative sign - STARS!!!

Put a short transparent tape at the back of the star like this and slap it on randomly on your box.

This is the end product. Okay, ignore the very bad handwork. I personally don't have much patience when it comes to doing handicrafts (I used to get the 2nd lowest mark in my class for Art, that's just self-explanatory #sorrynotsorryLOL!)
YOU'RE DONE! The last thing is to pop all your things inside the box.

Since I have a few products that are in tube-form, I decided to put a polystyrene cup in there to hold them in place.

Here's my neat makeup and skincare section! I love the fact that the box is deep enough to carry the tall bottles and surprisingly they fit every single thing!!!
You can see that I have my Michael Jackson badges as decorations by the side of the shelves, and next to the skincare storage box is the cup that holds my BB cream and lip products. The eyeliner sticking out from the cup is a new one that I just got a few days ago, haven't tried it on though but I will be doing a review on it soon. On top of the cup is a photo of my mom and I. The blue drawer storage on the very right holds all my makeup - eyeliners, eyeshadows, foundations, mascara, eyelid tapes and eyebrow trimming products. Some makeup wipes on the top and some extra products which I don't have to use them yet.
Yeah~ that's all for today! It feels so good to be back on my blog again ♥ I will try to blog as frequent as possible! I have a lot of pending blog posts which I have already scheduled in my diary which are to be posted up in the near future, so stay tuned!

I'm also working on some song covers. This time, it will be completely different the usual covers where I play guitar and sing all by myself. I'm actually learning how to do audio editing, trimming, recording with real microphones and even doing all the harmonizing myself. My housemate is more like the music producer! HAHA! It's a very fresh thing to us so we find it really amusing!!! Got myself a new Youtube channel > Fion Paris (please subscribe if you haven't)
Peace and Love xoxo
☮ Quote to share: A dream is just a dream. A goal is a dream with a plan and a deadline ~Harvey Mackay
Facebook: Fionism
Twitter: MJandOri4eva
Instagram: mjandori4eva
Dayre: Fion Paris
Tumblr: mjandori4eva
Youtube: fionparis
Email: fionism@yahoo.com
Thursday, November 13, 2014

I officially announce that lipstick and eyeshadows are the new obsessions of mine for the year 2014!
Remember my first lip product haul from Essence which I shared a few months ago? Click here to read the full entry.
Since I already have a pink and red lipstick, I wanted to try making orange-coloured lips which is very popular in Korea right now, especially orange gradient lips! I love seeing K-Pop idols with their gorgeous gradient lips but when I saw Xixi's tutorial on achieving gradient lips (here), I got discouraged from trying it even though it was absolutely gorgeous....because I'm too lazy....The need to conceal the colour of my lips is too troublesome to the lazy ass me, so I didn't bother giving gradient lips a try at all.
However, after watching a lot of Ulzzang photos on Instagram, I decided that it's time for me to stop being so lazy. That's why I went out and bought an orange lip lacquer. It's my first time trying out a lip lacquer (never heard of lip lacquer ever in my life before I bought this) and I found it really interesting - it has relatively higher colour intensity compare to ordinary lip gloss, but I personally don't like wearing it alone because it tends to be rather dry (not sure whether is it just because I have not been taking care of my own lips or whatsoever), so I used it to create gradient lips :3
Today, I'm going to share with you all my very 1st attempt on achieving watery orange gradient lips by using my own lazy-person method!
I skipped the part where you have to conceal your lip colour and I didn't even bother using a brush ><

These are the products that I used:
☆Essence XXXL Shine Up Lip Gloss #23 Dazzle Glow (around $1.50)
☆Nivea Hydro Care Lipbalm (around $3.50)
☆Savvy High Shine Lip Lacquer #1213 Bright Lights (around $7.90)

♥Step 1: Moisture your lips with a lip balm. I'm using my Nivea Hydro Care Lip balm here but you can use whatever lip balm that you have.

♥Step 2: Dot a few dots of the orange lip lacquer in the middle of your top and bottom lip.

♥Step 3: Spread the colour all over the middle part of the lip. Don't get it all over the entire lip.

When you are done, you will have something that looks like this. If you want the colour to be more striking, you can add a few more drops of lip lacquer on your lips. However, I personally prefer a moderate tone, something like a peach orange colour, so I'm sticking to this.

♥Step 4: Press your lips lightly on a piece of tissue paper.

This is to get rid of the excessive lip lacquer to avoid a mess later on.

♥Step 5: I applied the Essence Shine Up Lip Gloss around the orange colour which I spreaded just now to give the lips a watery and juicy feel ^^
That's all! It's all done now ^^ This whole process took me less than 2 minutes! As I said, lazy person method! HAHA! I'm the ultimate lazy bum so trust me with my tutorials because they are meant to be super easy and most importantly, fast!


I'm ending this blog post with some selfies with my new toy - my ukulele!

Facebook: Fionism
Twitter: MJandOri4eva
Instagram: mjandori4eva
Dayre: Fion Paris
Tumblr: mjandori4eva
Youtube: xplee94
Email: fionism@yahoo.com
Remember my first lip product haul from Essence which I shared a few months ago? Click here to read the full entry.
Since I already have a pink and red lipstick, I wanted to try making orange-coloured lips which is very popular in Korea right now, especially orange gradient lips! I love seeing K-Pop idols with their gorgeous gradient lips but when I saw Xixi's tutorial on achieving gradient lips (here), I got discouraged from trying it even though it was absolutely gorgeous....because I'm too lazy....The need to conceal the colour of my lips is too troublesome to the lazy ass me, so I didn't bother giving gradient lips a try at all.
However, after watching a lot of Ulzzang photos on Instagram, I decided that it's time for me to stop being so lazy. That's why I went out and bought an orange lip lacquer. It's my first time trying out a lip lacquer (never heard of lip lacquer ever in my life before I bought this) and I found it really interesting - it has relatively higher colour intensity compare to ordinary lip gloss, but I personally don't like wearing it alone because it tends to be rather dry (not sure whether is it just because I have not been taking care of my own lips or whatsoever), so I used it to create gradient lips :3
Today, I'm going to share with you all my very 1st attempt on achieving watery orange gradient lips by using my own lazy-person method!
I skipped the part where you have to conceal your lip colour and I didn't even bother using a brush ><
These are the products that I used:
☆Essence XXXL Shine Up Lip Gloss #23 Dazzle Glow (around $1.50)
☆Nivea Hydro Care Lipbalm (around $3.50)
☆Savvy High Shine Lip Lacquer #1213 Bright Lights (around $7.90)
♥Step 1: Moisture your lips with a lip balm. I'm using my Nivea Hydro Care Lip balm here but you can use whatever lip balm that you have.
♥Step 2: Dot a few dots of the orange lip lacquer in the middle of your top and bottom lip.
♥Step 3: Spread the colour all over the middle part of the lip. Don't get it all over the entire lip.
When you are done, you will have something that looks like this. If you want the colour to be more striking, you can add a few more drops of lip lacquer on your lips. However, I personally prefer a moderate tone, something like a peach orange colour, so I'm sticking to this.
♥Step 4: Press your lips lightly on a piece of tissue paper.
This is to get rid of the excessive lip lacquer to avoid a mess later on.
♥Step 5: I applied the Essence Shine Up Lip Gloss around the orange colour which I spreaded just now to give the lips a watery and juicy feel ^^
That's all! It's all done now ^^ This whole process took me less than 2 minutes! As I said, lazy person method! HAHA! I'm the ultimate lazy bum so trust me with my tutorials because they are meant to be super easy and most importantly, fast!
All the best in trying this tutorial and don't forget to wear this look with a smile :D
That's all for today. I'm hitting the zack now because I have to go to work tomorrow and study A LOT. I hate mid semester exams >< Good night my unicorns xx
☮ Quote to share:-
Peace begins with a smile ~Mother Teresa
Peace begins with a smile ~Mother Teresa
Twitter: MJandOri4eva
Instagram: mjandori4eva
Dayre: Fion Paris
Tumblr: mjandori4eva
Youtube: xplee94
Email: fionism@yahoo.com
KEEP SM:)LING
Thursday, August 28, 2014
Subscribe to:
Posts (Atom)